Organisations using Smap are increasingly managing work using data records that correspond to someone or something in the real world. This might be the maintenance of equipment, or the delivery of services such as education to a student, training to a teacher, health services to a patient or climate change resilience improvements to a community.
These applications represent an active form of Case Management where information is recorded against a case over time and used to guide the delivery of services. In the August release we have added a number of features to support this, including:
- Find and view the record of data that represents a case
- Update that data in a controlled way with logs and security
- Request a task be sent via email, or to a mobile phone app, requesting an action be taken and data be collected
- View all changes made to a case
- View the status of all tasks
- Send reminders if a task has not been completed via email or SMS or to fieldTask users
These activities can now be managed using a “Console” which allows a user to manage cases using the same forms that are used by the field workforce.
What is a Record?
In the Smap universe every time you submit results from a survey you create or update a record. You can group surveys so that they all share the same records. This allows you to, for example, create a record with survey A and then update it with survey B. Each case can be recorded in one or more of these records and so this feature is what provides a lot of the power of Smap as a case management tool.
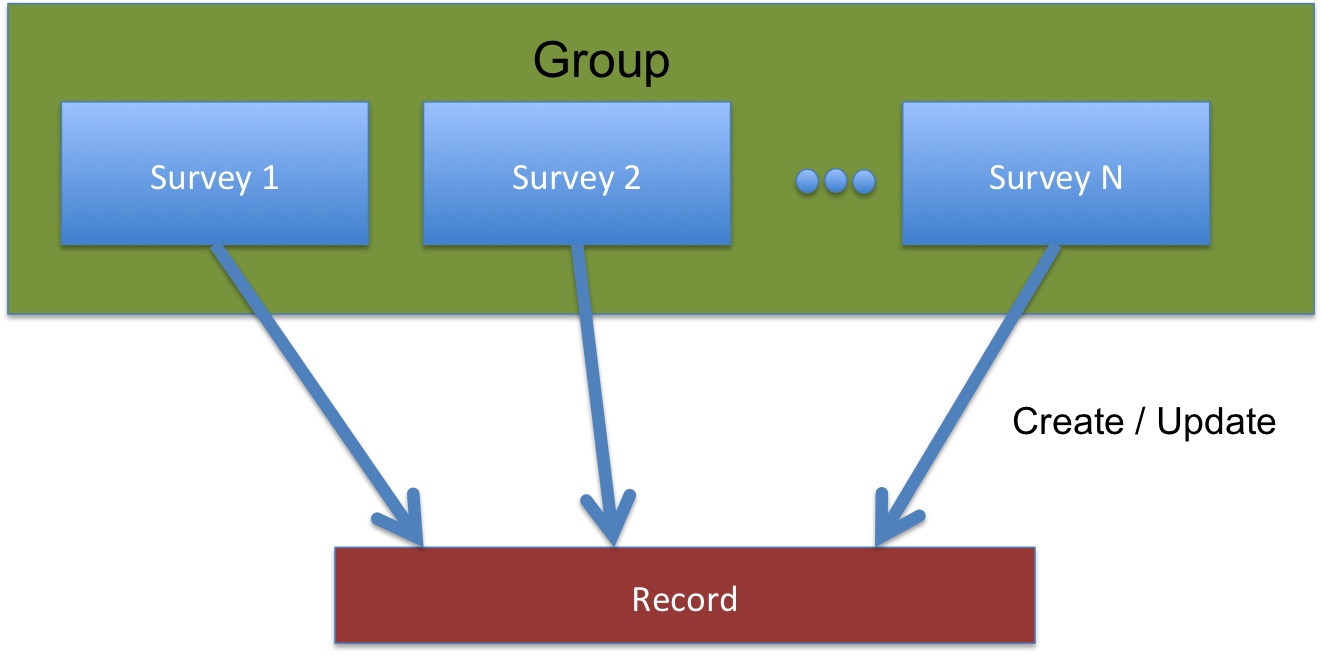
When you select surveys on the records page, if they are in the same group then you will see the same records for each of them although the columns that you see in the table will be determined by the columns in the survey.
Actually this is a slight simplification in that you can also use security roles to restrict the records shown on a per form per user basis so not all forms in a group need show the same records to the same users.
New Features
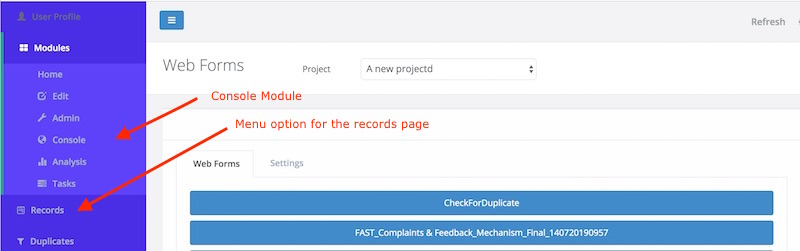
Replacement of WebForms with a Console module
Here is some history to explain where the console came from. In the old Web Forms module, as well as having a list of forms you could launch in you browser, there were menu options for Browse Results and Managed Forms. Browse results was going to be the new analysis page but we never managed to make it better than the old Analysis page so it just lurked in Web Forms not being particularly useful. Managed Forms was similar to Browse results but it allowed you to attach another form and edit the submitted data using that form. This has been used in applications such as Feedback and Accountability.
Now Browse Results and Managed Forms have been merged and renamed to “Records”. The WebForms module itself has been renamed to “Console”. It still includes the page to launch forms and respond to tasks using your browser but it now has a focus on individual data records rather than analysis of all the collected data.
A scalable records page
By scalable we mean that the console can handle hundreds of thousands of records. Previously the browse results page had problems when customers had this many records as it tried to load all the data into the browser first and then filter.
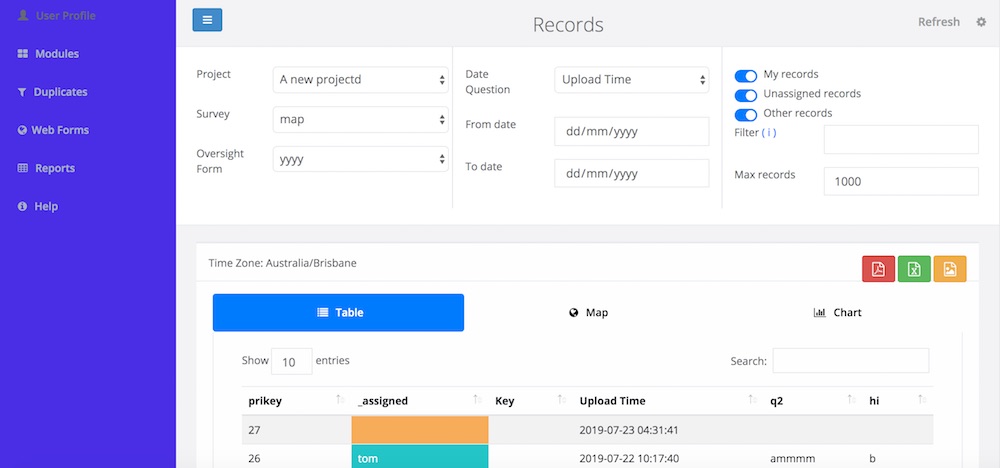
If you look at the records page you will see that it is in two parts. The top half consists of filters that are applied on the database before data is retrieved. Underneath are the table view, map view and calendar view. For these the filters are applied in the browser. Hence you can select the survey, the from date, to date, an advanced filter and max records and a new query will be made on the database to get that data. The first time you open a survey the limit will be set to 1,000 so that you don’t have to wait to get the data. You can then change the limit of you need to see more, or less, records.
Modifying a Case
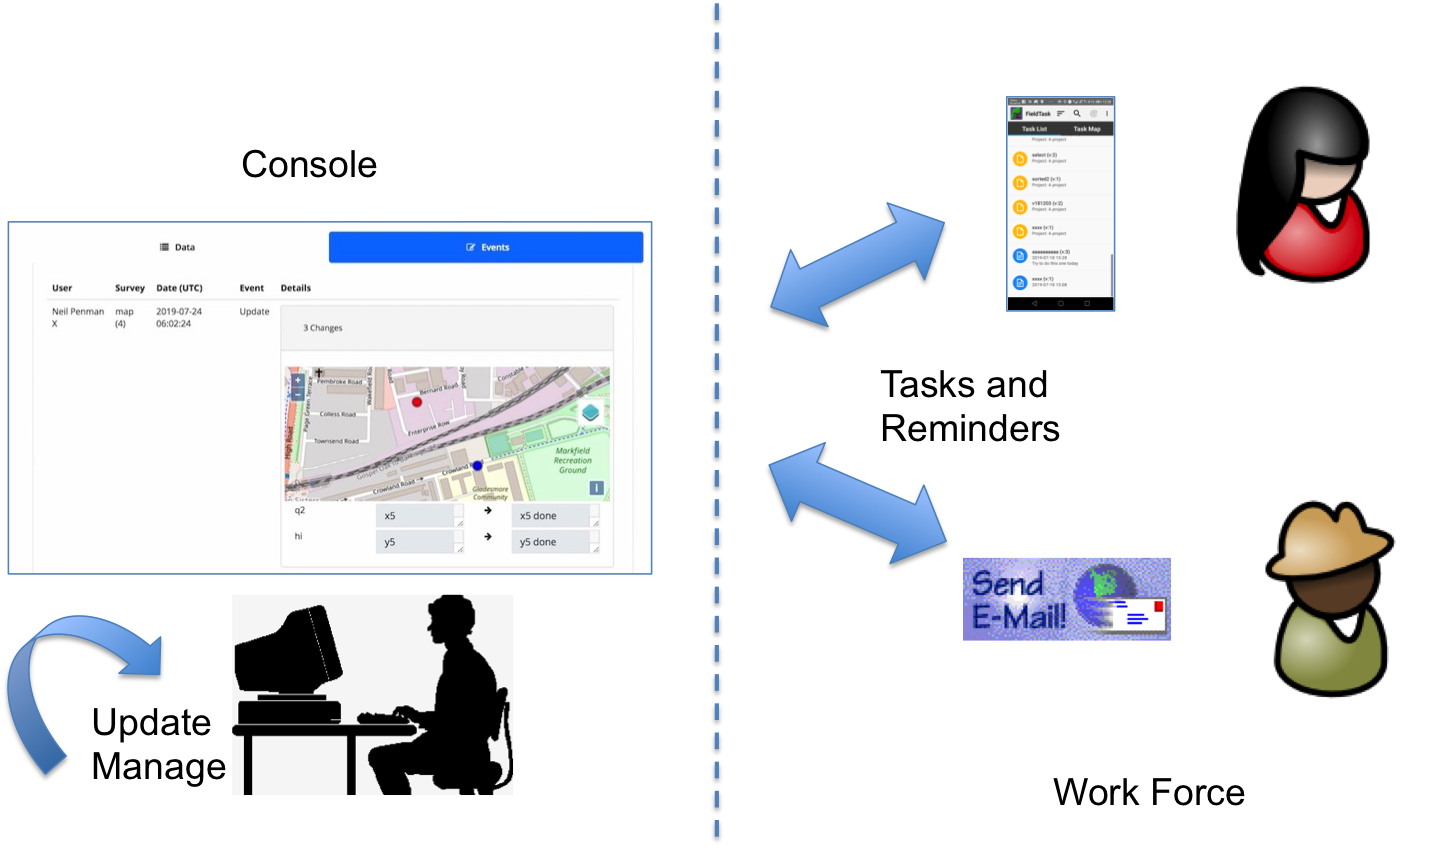
When managing a case you will need to be able to make changes to the data directly from the console. The first step is to lock a case for editing. Once you have done that it is assigned to you and other people cannot edit the same record, although an administrator could re-assign the case to someone else. In the diagram below the “Unassigned Records” switch is selected so that cases not assigned to anyone can be selected. An unassigned record has then been selected by clicking on it. The button “Lock for Editing” can then be clicked.
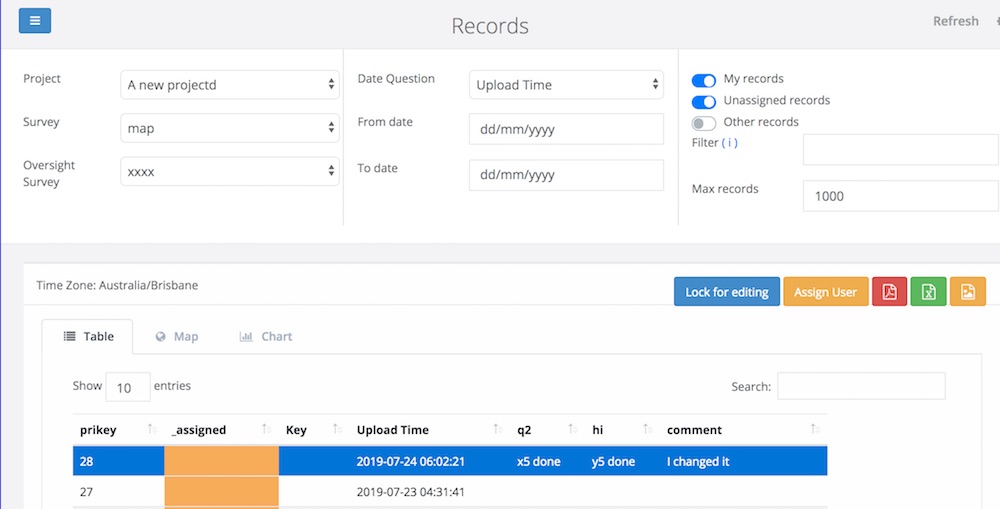
Once you have locked a record the edit button will be shown. The questions you can change are determined by the Oversight survey that you have selected as well as any security roles that have been applied. These questions are shown on the right hand side of the page and are labelled as “Management Data”. Any remaining questions in the main survey that are not in the oversight survey are shown as read only on the left hand side for your reference.
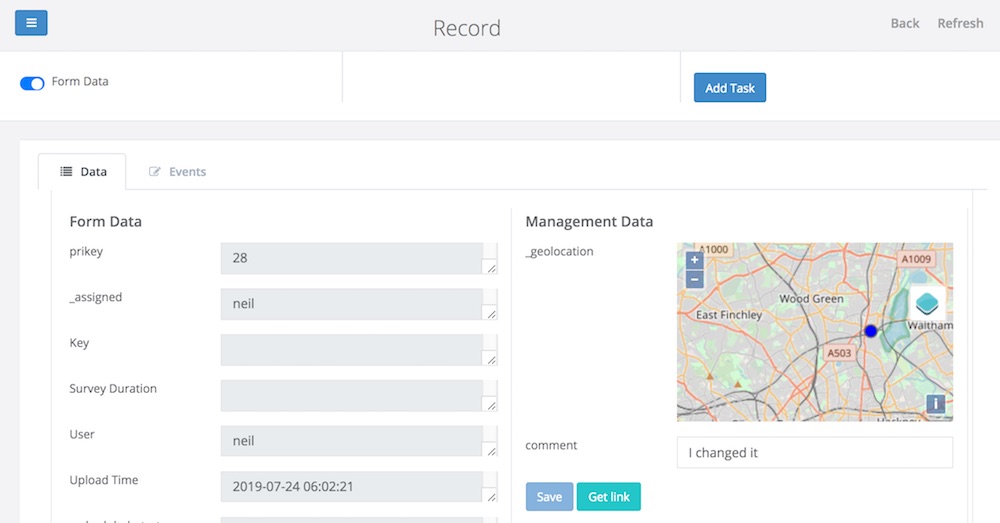
In the above image there are 2 questions in the management form, a geopoint question and a text question labelled as “comment”. You can select a new location, change the comment and then click “Save”. The existing data for the record will be updated.
Reviewing changes to a Case
If you click on the events tab you can view all changes made as well as see all task and reminders that have been created for the record. You can also create new tasks that can be assigned to your field work force to update the case or send a reminder.
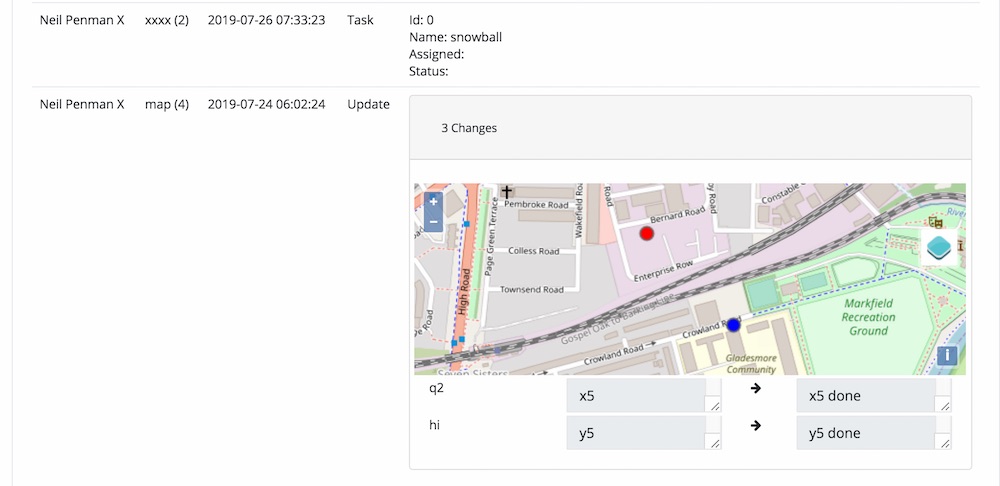
In the above diagram changes have been made to the record using the survey called “Map”. The location question and questions “q2” and “hi” were changed. For location questions; points, lines, areas the old location is shown in blue and the new location in red.
A task has also been created on this record but it has not yet been assigned to anyone.
Conclusion
There is a lot more functionality in this upcoming release that I will talkcover once the software is deployed to the servers. Hopefully this post will give you some ideas for the types of case management applications you will be able to create from about the middle of August.